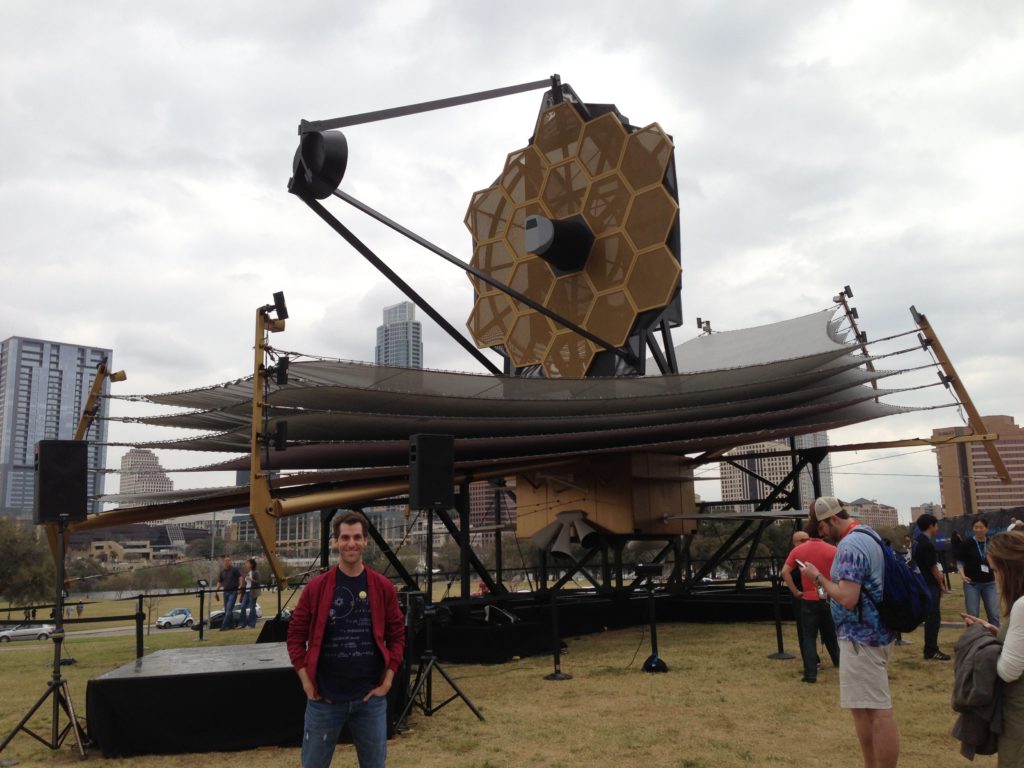
The telescope launched this morning and didn’t explode. Only took an eternity. Hope it unfurls successfully. I saw the replica en 2013, the photo deserves a repost.
The telescope launched this morning and didn’t explode. Only took an eternity. Hope it unfurls successfully. I saw the replica en 2013, the photo deserves a repost.
Ever since I moved to Austin almost 20 years ago I’ve been missing and craving profesional soccer.
The long long wait is finally over. Today the Q2 stadium, Austin FC’s home was inaugurated with a friendly between the USWNT and Nigeria. Final score 2-0 to the locals.
Of course Ilán and I were there tonight, last weekend for the soft opening, and will be here this coming weekend to see our new team’s first ever home match.


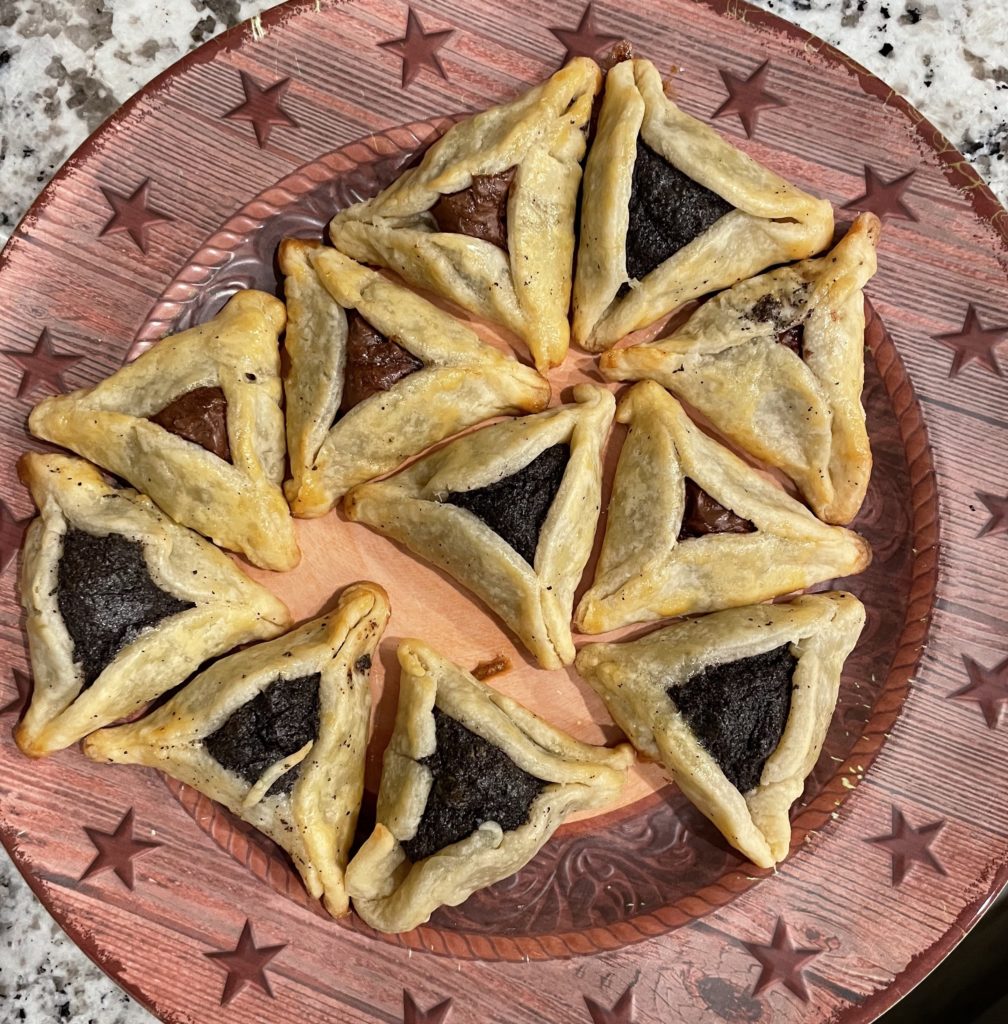
I don’t like jelly hamantashen (Yidish המן־טאַשן; in Hebrew Oznei-Haman / אוזני המן). Those are for sissies. But everywhere you go, that’s the only flavor!
What I really really really like, and this should not come as a surprise to long time readers, are the mohn aka poppy seed ones. It was time for me to take matters into my own inept cooking hands! And I capture it here for all posterity and because I sort of made it up as I went but want to remember some details for next year.
To make the poppy seed filling:
Grind a bunch of poppy seed in a coffee grinder until you think it’s enough. Melt a bunch of butter (I did like half a bar) in the microwave. Then add the poppy seed. Finally add sugar. How much? If you are not an experienced baker, then imagine an amount that sounds like a crap load. Add twice as much. Mix it until you have a paste.
To make the dough:
Take out the pre-made pie crust, unroll it, use a cup to make circular cutouts. Roll the remaining dough then make more holes. Repeat until you have no more dough.
To make the cookies:
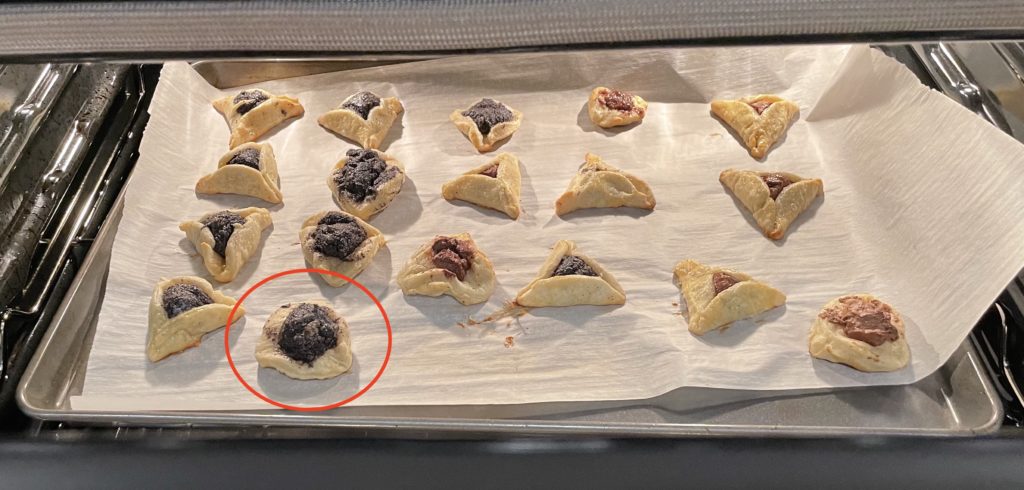
This is the hardest part. Using a teaspoon, put a bit of filling in the middle of each circle. Fight your instincts to add lots of poppy seed because you love it: it it makes the things behave like Shrinky Dinks when in the oven.
Fold it into a triangle, leaving a little window to showcase the black gold. Make sure to squeeze the corners real tight or more Shrinky Dinks!
And don’t forget to make a few with the Nutella for your snotty little kids who should know better.
Use a brush to cover the hamantashen with egg so they come out nice and shiny.
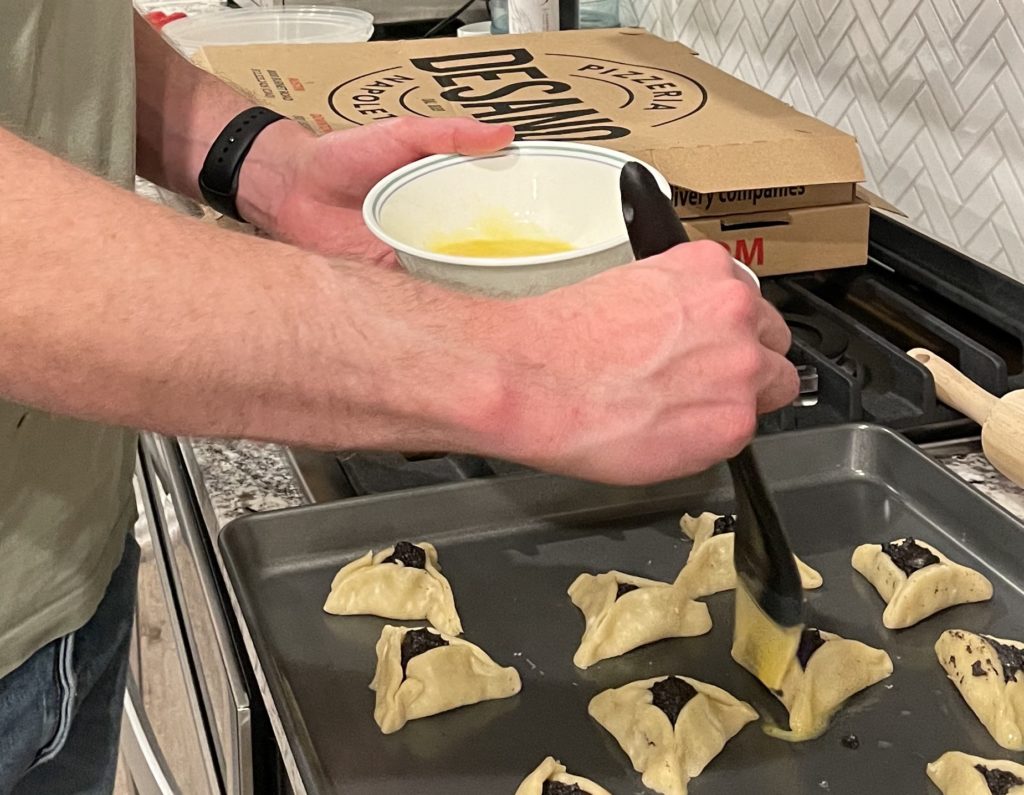
Bake
Put the hamantashen on a tray on top of parchment paper. Or don’t use the paper. I don’t know. But I did and it worked out.
Bake at 400 ℉ for about 10 minutes.
I highly recommend waiting for them to cool down before eating.
As if a global pandemic wasn’t bad enough, February decided to bring us a record-breaking insane polar vortex.
I don’t even know what records were broken. But it was bad enough to bring the Texas electrical grid to its knees, break countless tree branches, and make pipes explode everywhere. We aren’t ready for it.

How did we fare? Not too terrible: Schools were obviously cancelled for a bit over a week. We live in a very hilly neighborhood, and have a very steep driveway, so for a week our cars were stuck as everything was covered in ice. We had running water for the first half of it, but then lost water pressure. A leak in the roof became very apparent as the snow accumulated and started to melt. We lost power intermittently, but never for more than maybe 8 hours which means temperatures never dropped enough inside the house to force me to use the emergency wood for the fireplace.
But it was from from all bad: I enjoyed long walks around the white neighborhood using my makeshift snow shoes and we all had a blast sledding down our neighborhood park using an inflatable raft!


For the first time since I became a self-sufficient adult and incentivized by the lockdown to have another place to be in, we built a sukkah (סוכה) for… yes, you got that right: Sukkoth (סוכות).
When it comes to building a sukkah, there’s two ways to go:

So for all the many readers of The MKX® and other people searching the Internet for instructions on “how to build a sukkah”, this is how I made a really nice, inexpensive, easy to build, reusable sukkah.

This is the key ingredient. When I bought it it had a nice discount so it was a bit over $200. It comes with walls, and neatly folds into a nice bag with wheels. Buy it in whatever color you want (I got white). Note that the walls attach to the roof using velcro, and I obviously don’t use the roof. So this is a problem.
Unlike most pre-made sukkot, this thing is light, sturdy, and comes as a single piece. No construction or tools needed!


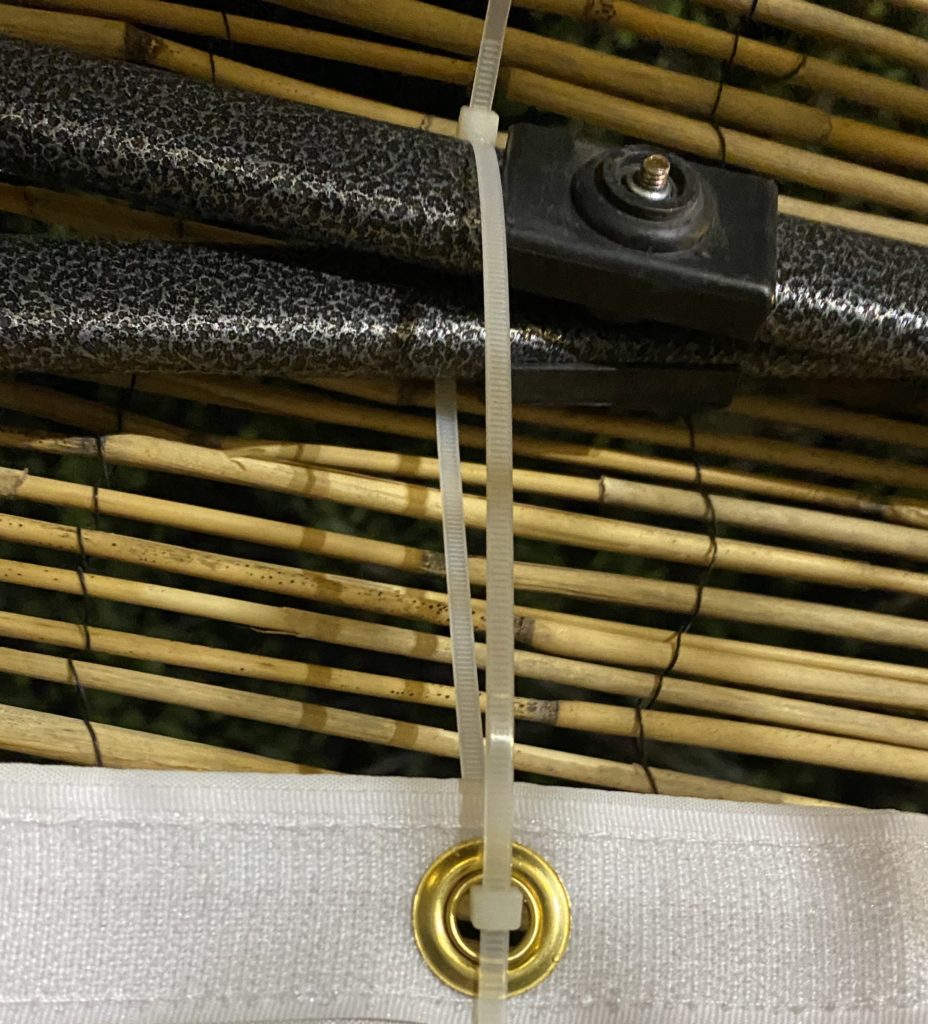
$12 from Home Depot. Since the walls attach to the fabric roof using velcro, I needed an alternative. Enter this grommet kit. I made 5 holes on each wall – right on the aforementioned velcro – so I can attach the fabric walls to the structure of the canopy. This part took the longest but is also the one part I won’t have to repeat next year.


One of the best things since sliced bread, zip ties are your friend. Buy a big bag and use them to hang the walls and just about anything you need. Apply them generously, mostly because they are so incredibly satisfying.
The roof, perhaps the most important aspect of a sukkah is where it could all have gone wrong. My gardener Carlos didn’t come through with palm leaves, and the pre-made kosher roll up s’chach (סכך) would have cost around $300 for my 10×10 area.
My buddy Dajman gave me the ultimate tip: 6 ft. H x 16 ft. W Natural Reed Garden Fencing from Home Depot, $25. Perfect 👌🏻.

Unroll two of these on the to of the sukkah and you’re good to go. Didn’t even need to tie them.
Add a few string lights and decorations and hang them with those zip ties that are sooo satisfying and… voilà!, we have a festival in our hands. Chag Sameach!


The MKX® staff wishes you a Happy New Year full of health and normalcy.
The new Apple Watch is out. I was very surprised by a very familiar sight at the beginning of the ad… as in: most mornings this is what I see familiar.
When did she shoot this? How much was she paid?

After hundreds of scanned photos, I noticed streaks in the photos. I looked at the original prints and the lines weren’t there. Looking at more photos, it became obvious that the issue was in the scanner. Was my fancy toy broken so soon?

No, it turns out that the frequent warnings in the manual and in the software about cleaning the scanner often were legitimate. Turns out that dragging thousands of ancient photos through, many of them with glue residue in the back, gets things dirty.
Surely enough, a bit of wiping with the bundled microfiber cloth made the issue go away.
Pro tip: clean the scanner often.

And now what?… redo all the bad scans or no? It’s about 2000 photos.
I suppose if I don’t do it now, nobody will ever do it. Deep breath, roll sleeves up, and redo the bad scans. At least I’m now getting the hang of it.
