My parents came to visit and on my request brought along three fat photo albums from when I was born. I needed to show my wife that our son does indeed have an eery resemblance to my extremely young self, if not my adult self.
As you’d expect from photos that are over *ahem* twenty years old, they’ve suffered from some terrible degradation (older post on the subject). Not surprisingly, the photos degraded differently based on the photo development process and paper used. Some even got extremely blurry – and I think those are a lost cause.
So obviously I need to scan them all. To make the digitizing work worse, and unlike my wife’s old photos, these are glued to the album pages with transparent cellophane on top. To try and pry the photos off the album will most likely destroy them, so they need to be digitized off the page. I think this means that using a digitizing service like we did before will not be possible.
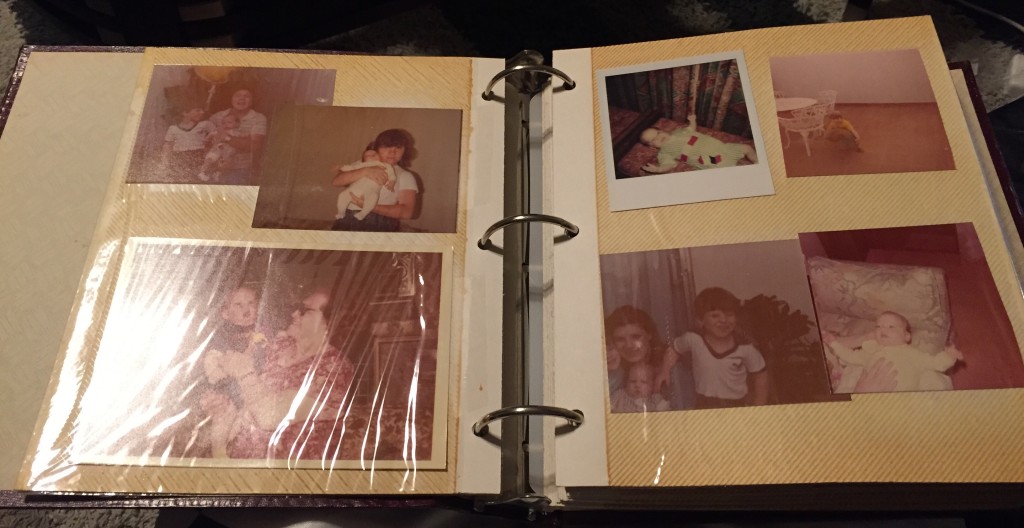
Here’s what the album looks like:

Like crap (please don’t get me started on idiotic Instagram filters people are using nowadays).
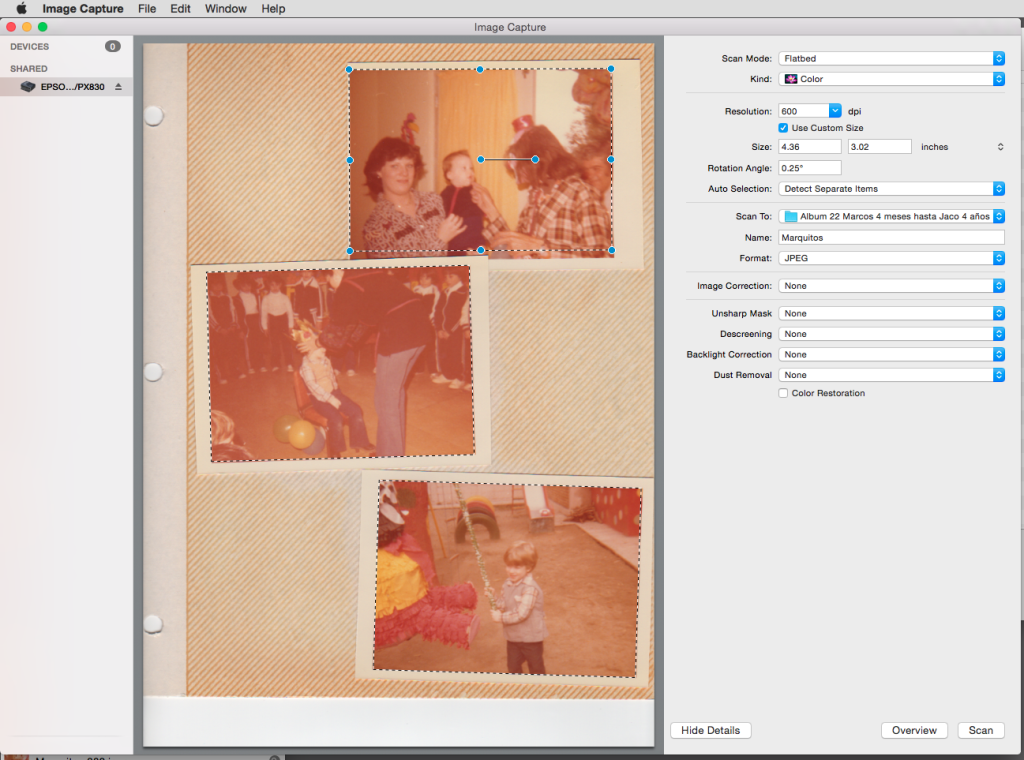
I already finished scanning one of the three albums. It wasn’t a fun process. I used an Epson Artisan 837 and the built-in Image Capture application that comes with OS X. I scanned everything at 600 dots-per-inch, which I believe easily exceeds the sharpness of the old photos.
One nice thing about Image Capture, is that it can auto-detect the photos on the page, and scan each one of them as an individual file.

It will even fix rotation! Unfortunately I didn’t have great luck with this because, as you can see, the glue is extremely yellow at this point so the program had trouble recognizing where the photos are. I would end up selecting the photos by hand.
This made the process quite tedious:
- Take out page from album
- Remove cellophane
- Place on scanner
- Go to computer, press “Overview”
- Wait
- Adjust what photos will get scanned
- Press “Scan”
- Wait
- Flip page to scan the other side
- Repeat process from #4 to #8
- Put cellophane back on page
- Reinsert to album
Hardly a model of speed, automation, and efficiency.
I will refine the process for the other two albums, no doubt. For one, I will skip overviews and just scan full pages. It will make scanning a lot faster. I will also try and connect the scanner over USB rather than WiFi. I have a hunch that this was the main bottleneck to the scanner’s speed and not so much the digitizing itself.
But this means that I would need to cut individual photos out from a single page scan to individual files as a post-processing step. My goal is to automate this – research needed and advise appreciated.
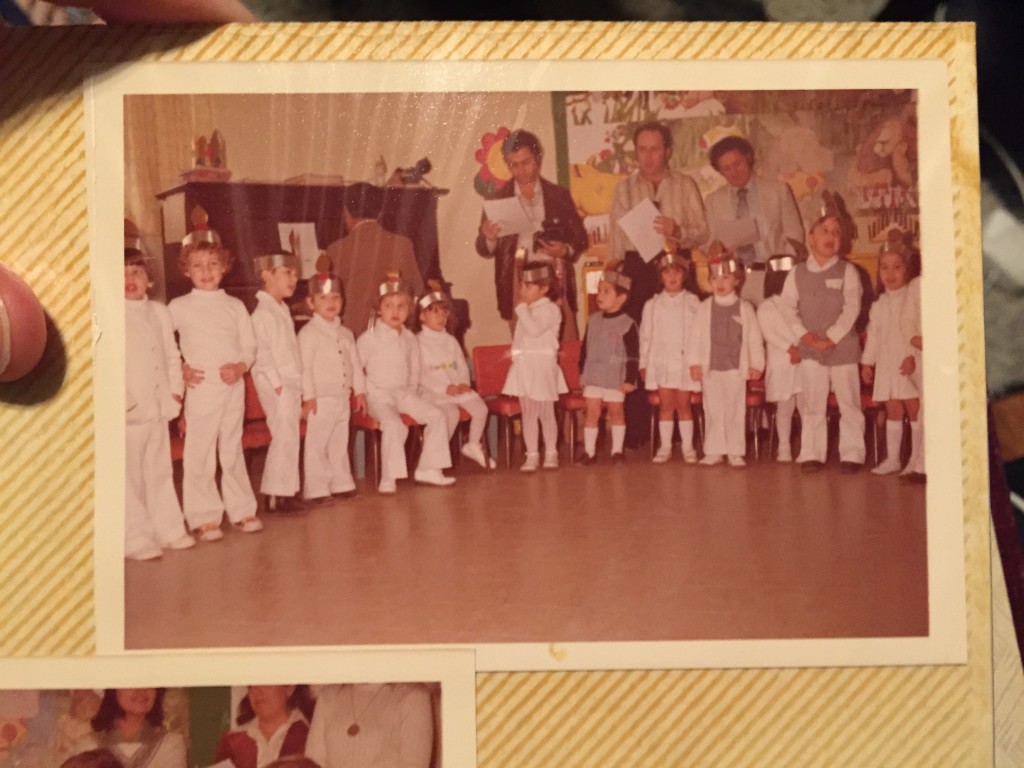
The last step: fixing the colors of the photos. I played around with adjusting all the color curves of a specific photo manually on the excellent Pixelmator. This is what the original photo looks like:

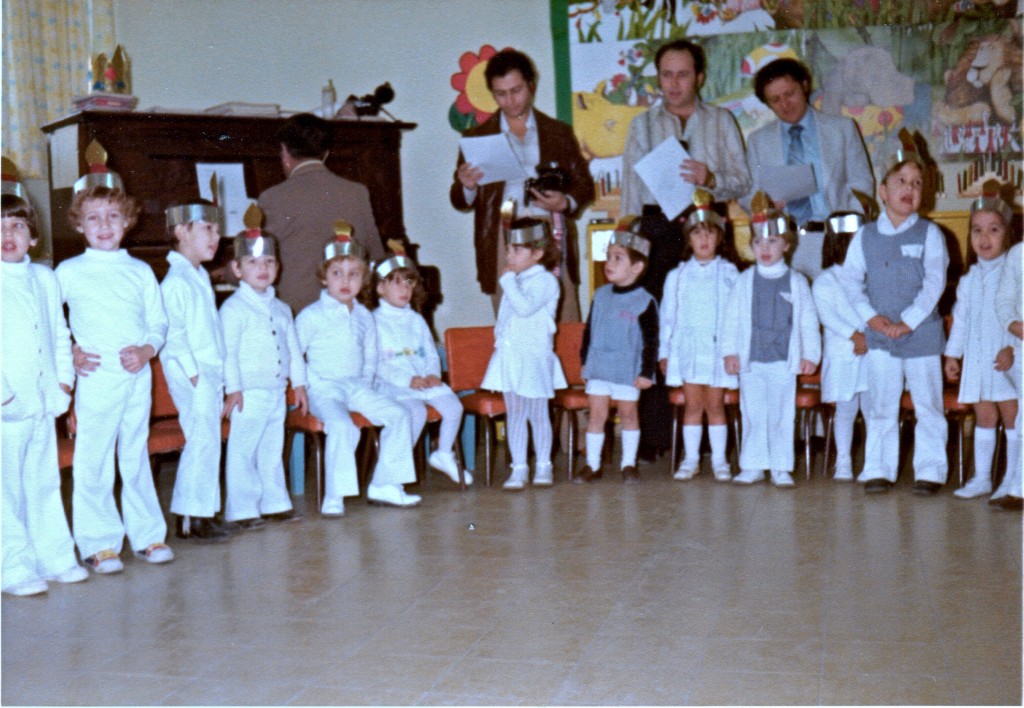
It took a bunch of tweaking, but the results seem pretty good:

Not bad, huh? (you can click to zoom in)
Of course, fixing each photo manually like this would take a tremendous amount of time. I think the way to go, barring a completely automated solution, is to group photos by era, album, and photo paper; since those would all degrade the same way. I can then apply the same combination of color-correcting filters. I haven’t yet figured all of the details out, so this is material for a future post. Far into the future most likely.
For now the important thing is to scan the rest of the photos so we can freeze the color degradation.
